8 min to read
XREAL Daka Case
Introduction
XREAL One
XR
The XREAL One is a pair of XR display glasses. In practical terms, it is a portable external monitor worn like glasses and connected over USB-C.
While far from a desktop replacememt, they are incredible for mobile use: travel, site visits, temporary desks, and other and other places where a laptop is available but the screen is limiting. The glasses provide a larger working area without carrying a larger computer, and the ultrawide mode makes them even more useful.
Specs
- 50 degree field of view
- 0.68” Sony Micro-OLED display
- 1920x1080 resolution
- 120 Hz refresh rate
Problem with stock carrying case
The weak point is the stock carrying case. It is larger than it needs to be, has no separate cable compartment, and the closure is not secure enough for loose bag use.
It protects the glasses when handled deliberately, but is not sufficient to be able to put the glasses in a bag and stop thinking about them.
Aftermarket EVA foam cases
Aftermarket EVA foam cases improve some of this. The better options have smaller form factors, zipper closures, and cable compartments.
However, the several products I tried are all EVA foam cases. Despite being advertised as a hard shell, the case is very much crushable. It is better organized than the stock case, but it is still not something I would bury in a bag under tools, chargers, or other objects.
Pelican Inspired Case
The first solution I tried was a derived Pelican-inspired 3D printed case. I added reinforced ribs for crush protection, a separate cable storage compartment, and designed a silicone cradle for the glasses.
Mechanically, the idea made sense. In practice, it was too complicated for this problem. The printed shell needed extra thickness to be strong enough, which pushed the form factor in the wrong direction. The silicone cradle and 3D printed parts also made the cost of entry higher than the benefit justified.
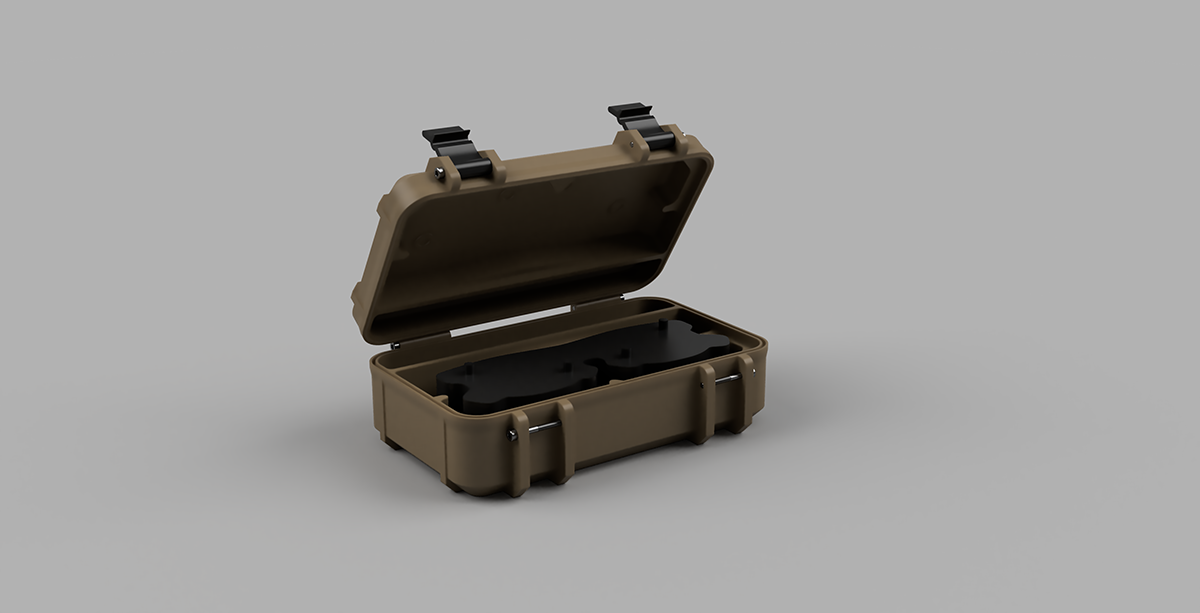
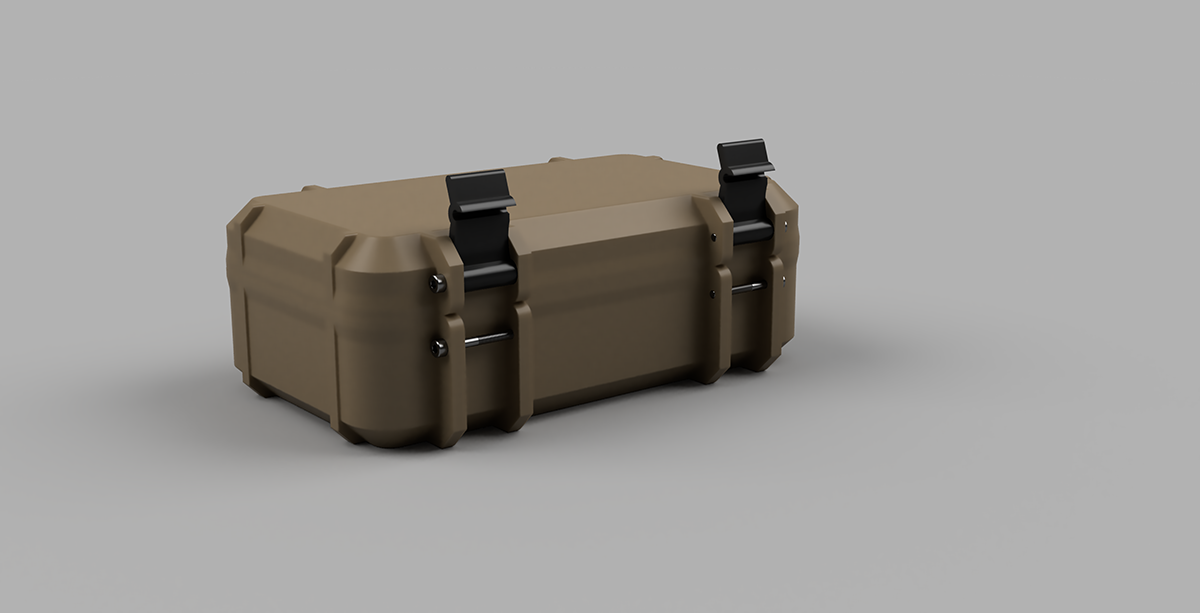

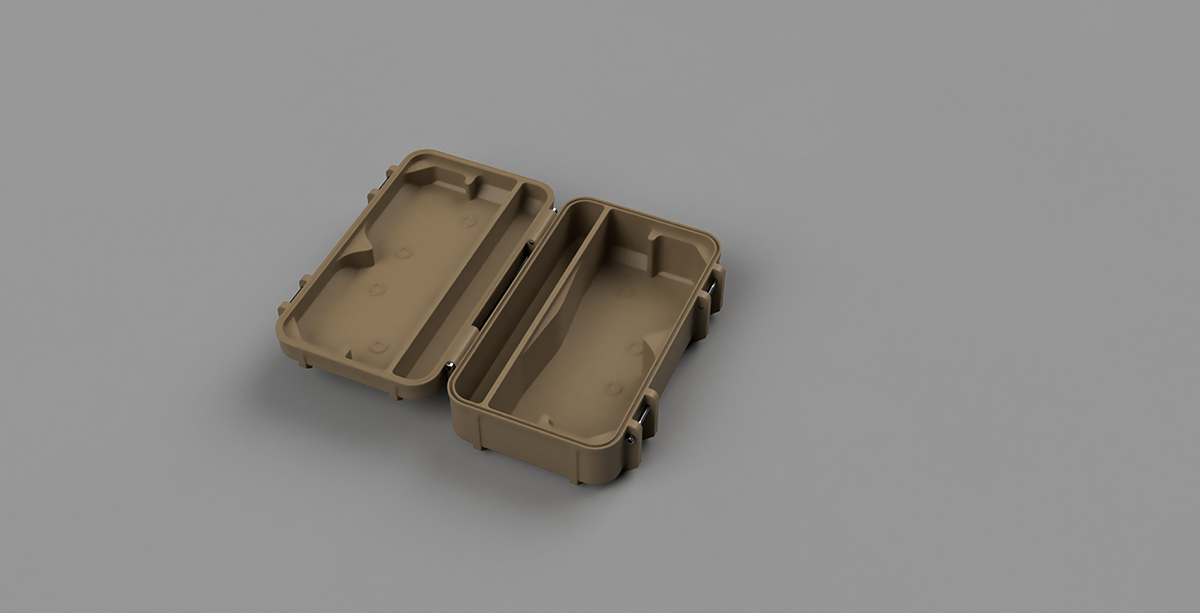
Magpul Daka Can
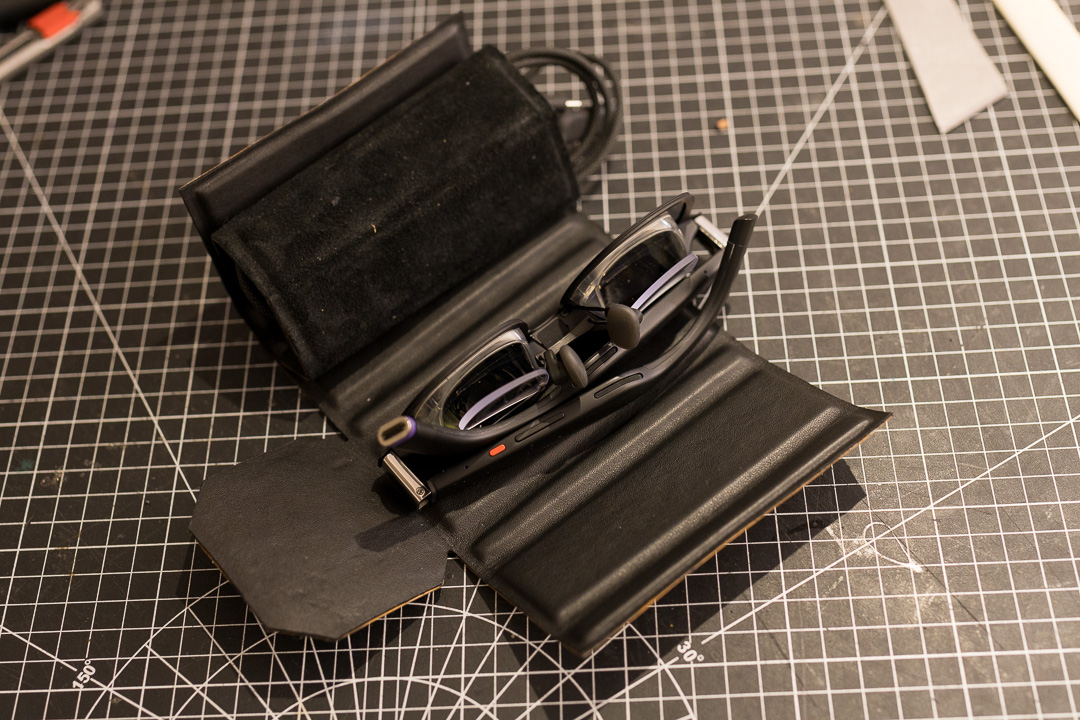
The Magpul Daka Can is an off-the-shelf hard glasses case. It is a practical starting point because the protective shell is already solved. The remaining problem is the interior.
The exterior is utilitarian and non-descript. The top-loading format is also a good fit for the XREAL One because the glasses can sit vertically, with the cable stored in a separate space.
The shell is reinforced polymer, so it addresses the main failure point of the EVA cases. It is not custom to the glasses, but it gives a rigid container with enough internal volume to build around.
| Dimension | Exterior | Interior |
|---|---|---|
| Height | 6.6” | 6.1” |
| Width | 3.4” | 3.0” |
| Length | 3.1” | 2.5” |
The interior volume is tight enough to keep the case compact, but large enough for an insert, a soft contact surface, and a cable divider. That makes the Daka Can a better base than designing the entire enclosure from scratch.
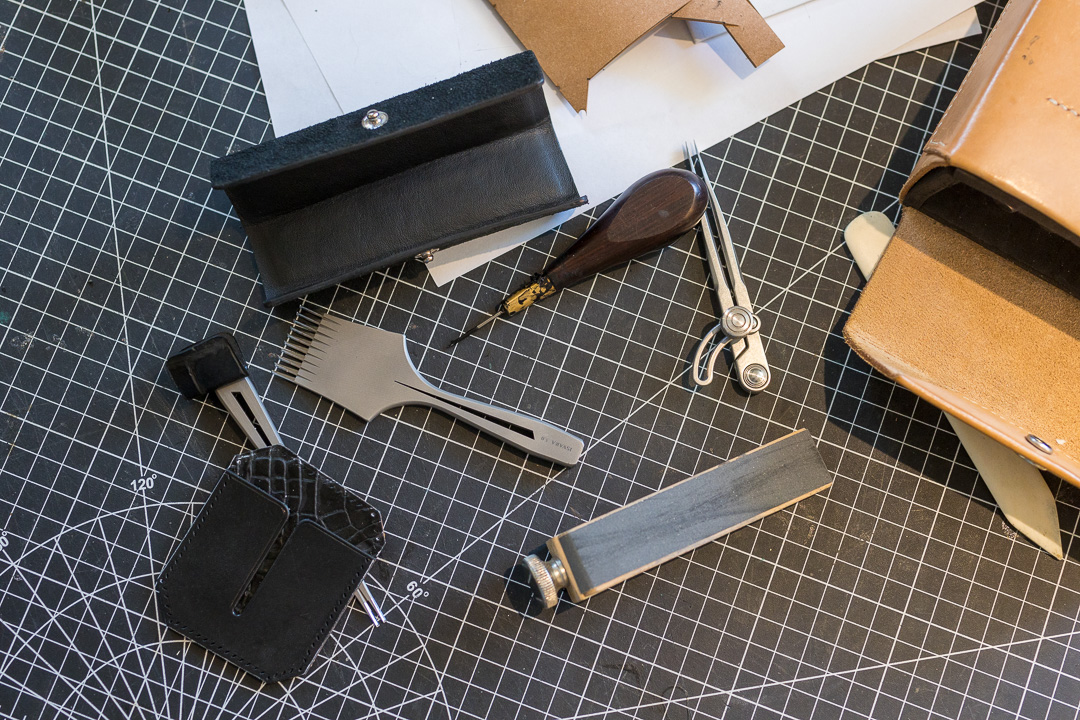
Custom Insert
This was my first leather project after a long hiatus, so I wanted something small and controlled. The goal was a simple insert that would make the Daka Can usable for the XREAL One without changing the case itself.
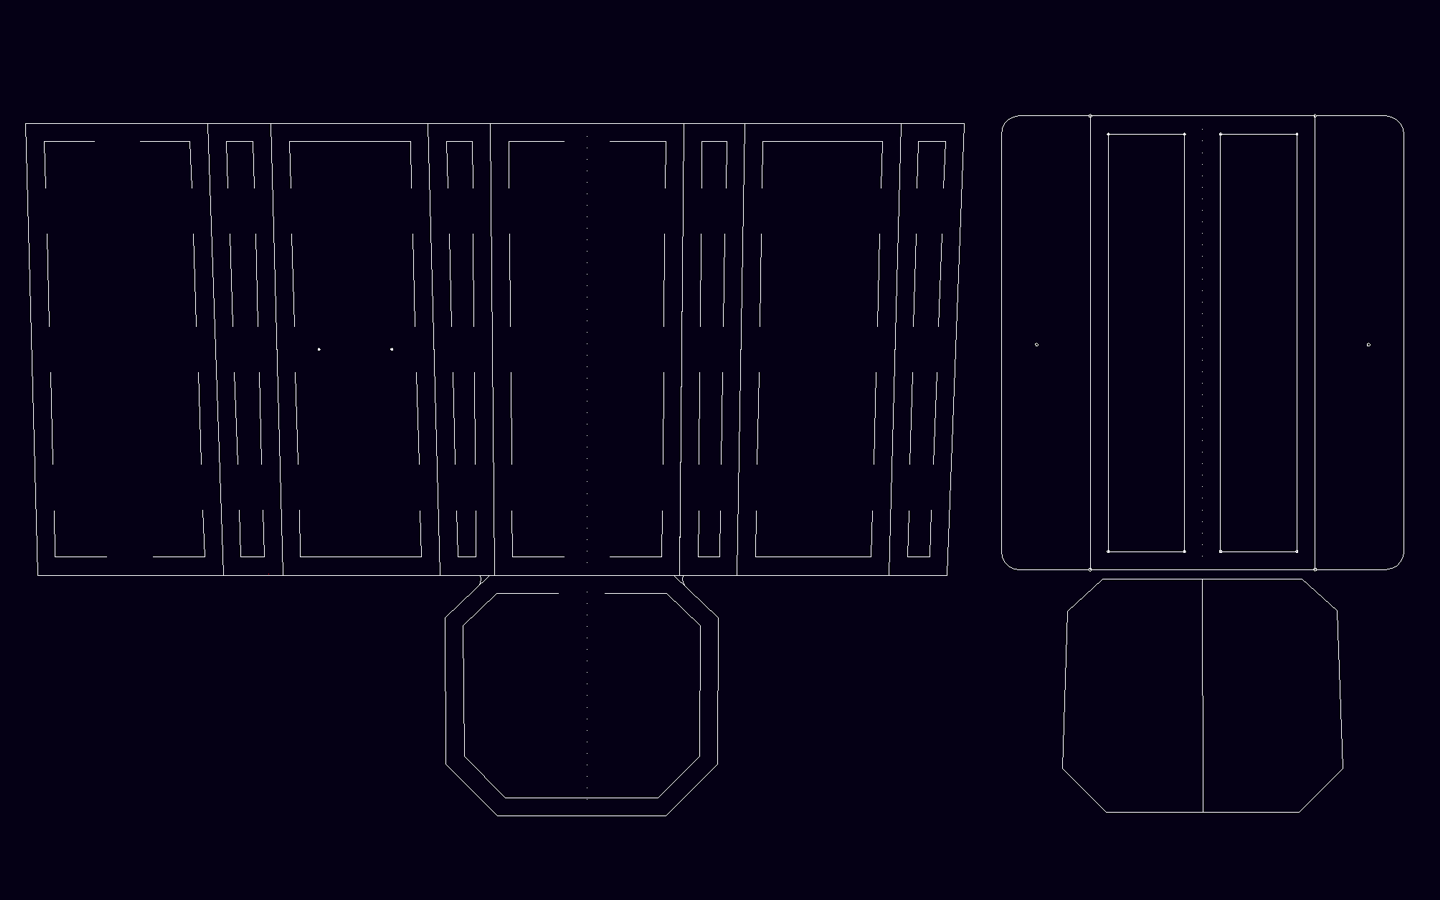
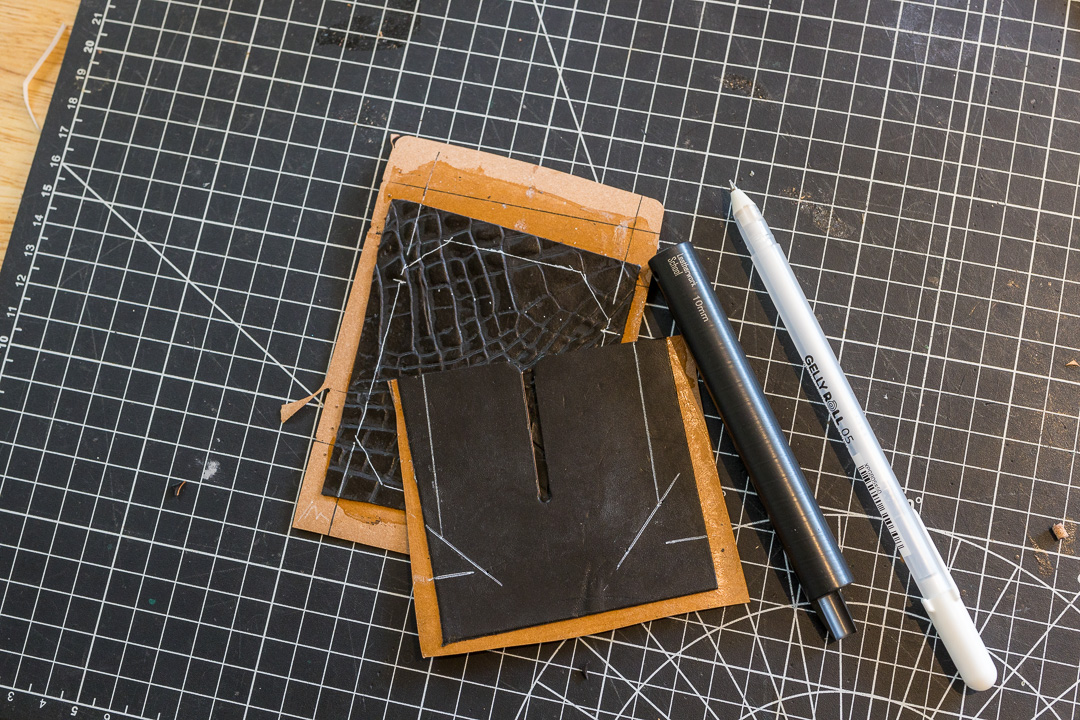
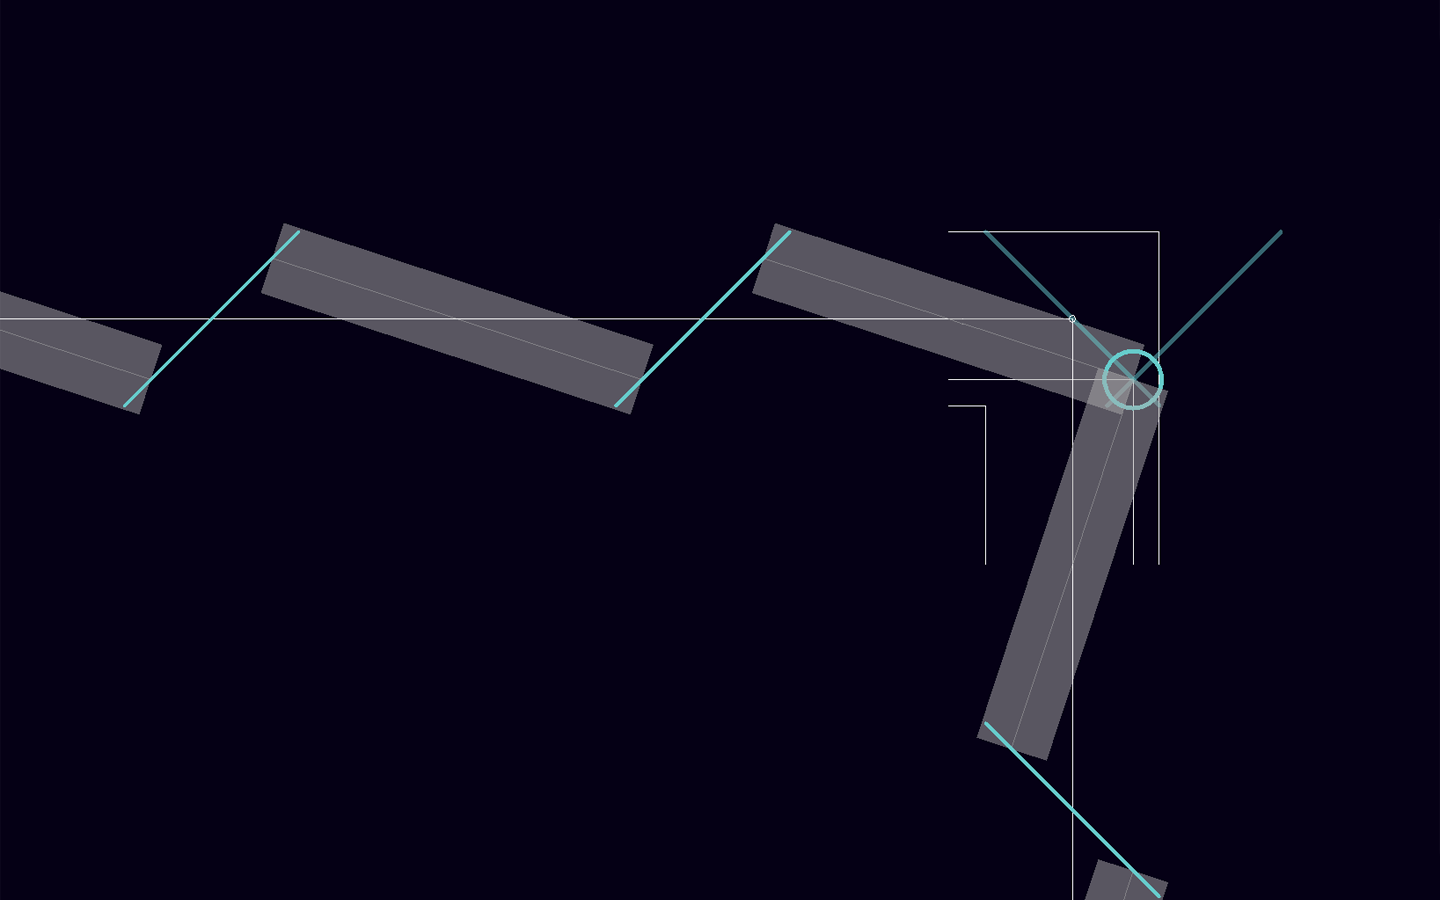
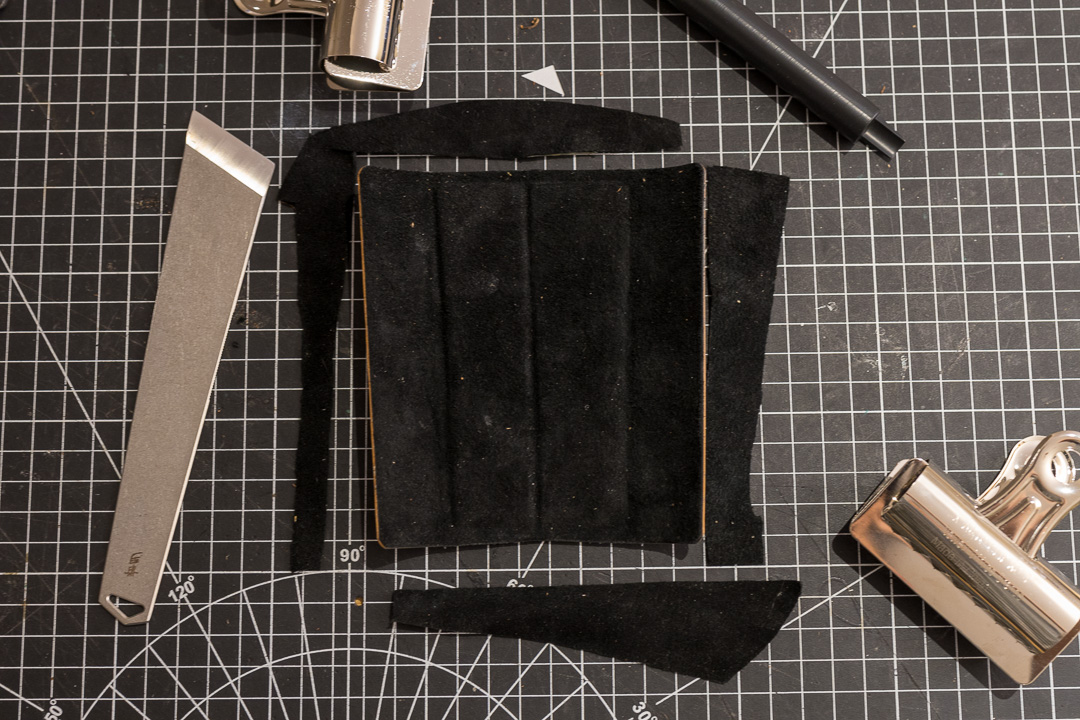
But this project became more involved than expected. The case interior is not a simple box. After several redraws, I ended up tracing the original insert, and that is where I realized the insert shape is a tapered hexagon with sides of different lengths.
Construction also expanded beyond a basic liner. The final insert uses Salpa for rigidity, foam for padding, and a combination of goat skin, suede, harness leather and aligator detail pieces.
Pattern
The Daka Can insert is a tapered hexagon, and the sides are not all the same length. Small errors show up quickly because the insert has to sit cleanly inside the case without shifting or buckling.
I tried drawing it from measurements first, but the geometry was awkward enough that tracing the original insert was the better method. The traced pattern gave me the perimeter, notches, and reference points needed to keep the new insert aligned during construction.
Construction
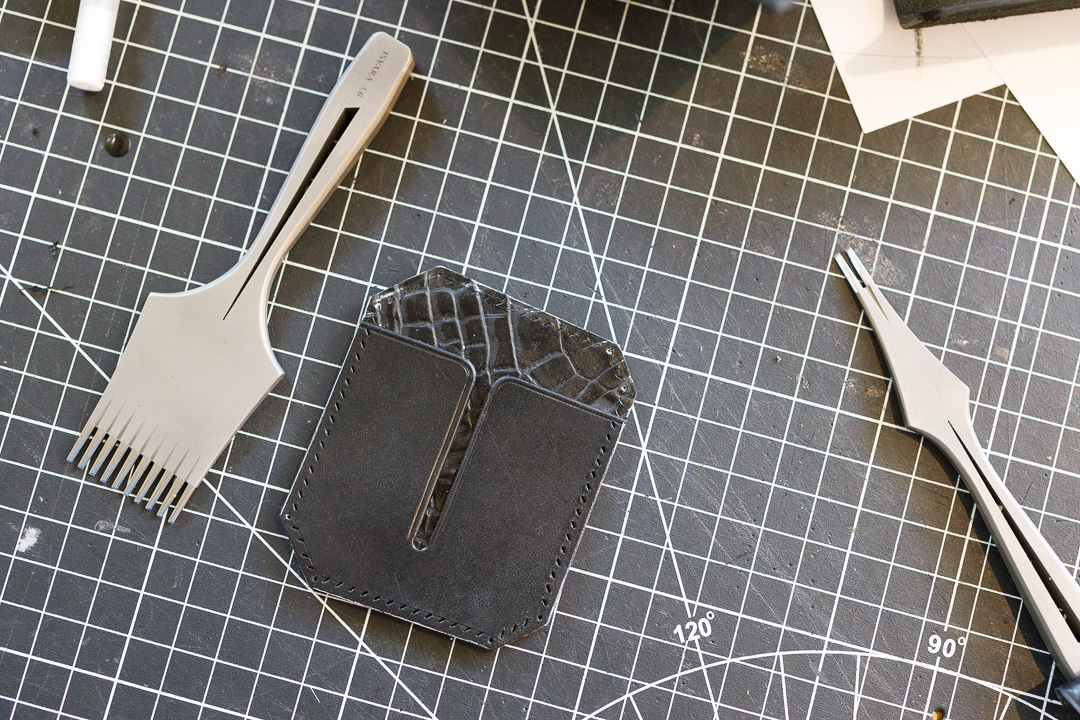
Main Panel
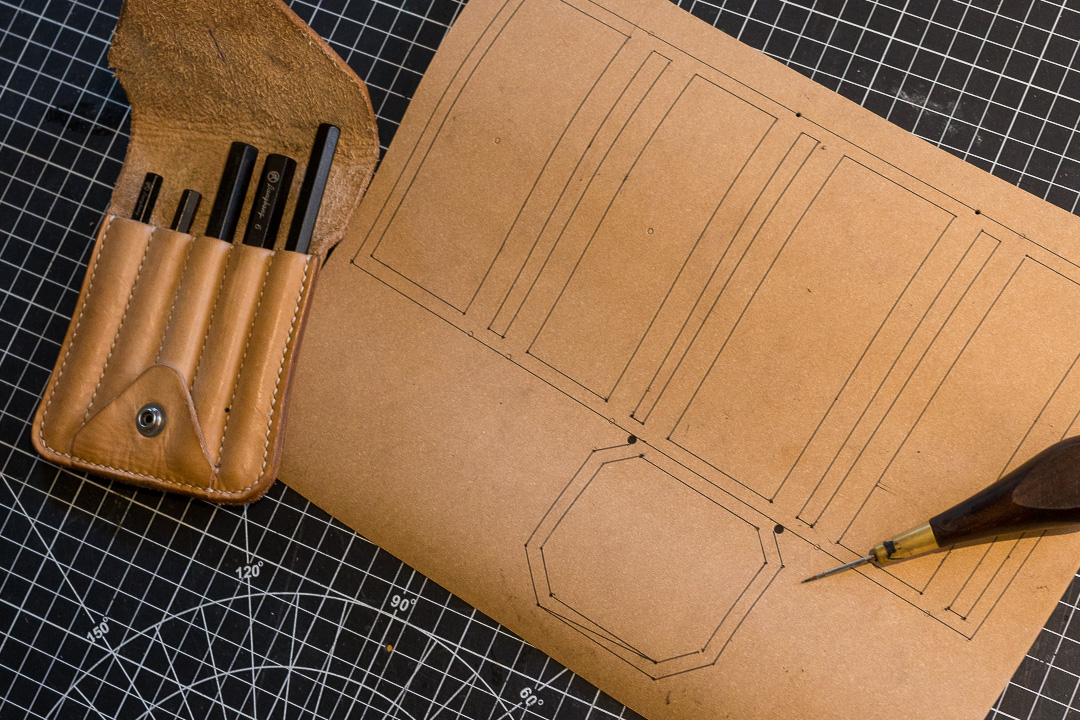
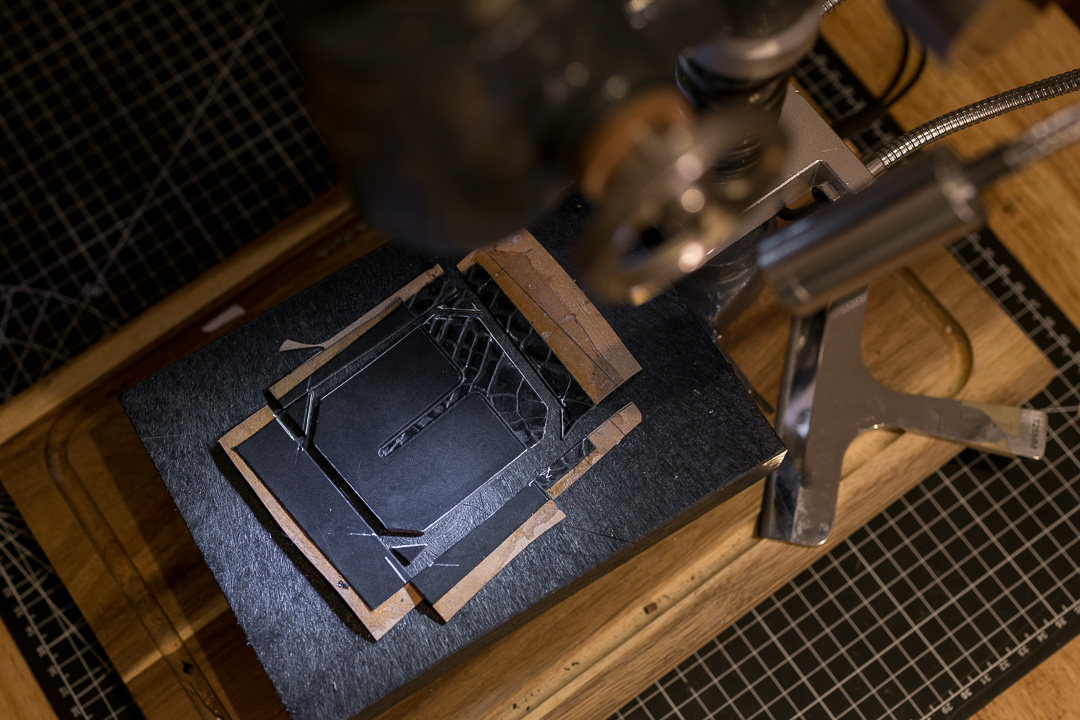
The main panel started with the traced pattern transferred onto 1mm Salpa. I punched the indexing notches and placement markers before adding the softer layers, since those reference points become harder to locate once the panel is built up.
I added 2mm EVA foam for padding. This gives the glasses a softer contact surface, while the Salpa keeps the insert from collapsing or wrinkling inside the case.
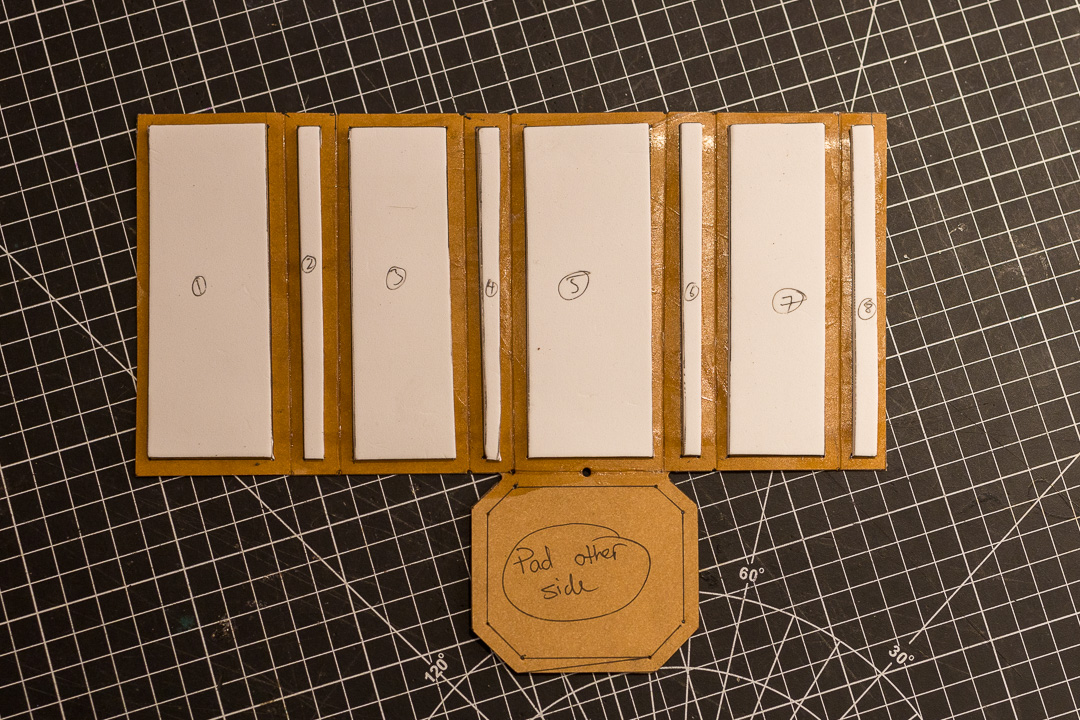
The contact surface is 0.5mm calf skin formed over the foam. I originally expected to sew this layer, but left it unstitched for a cleaner look. The 5mm border of contact cement should be plenty for holding the panel together.
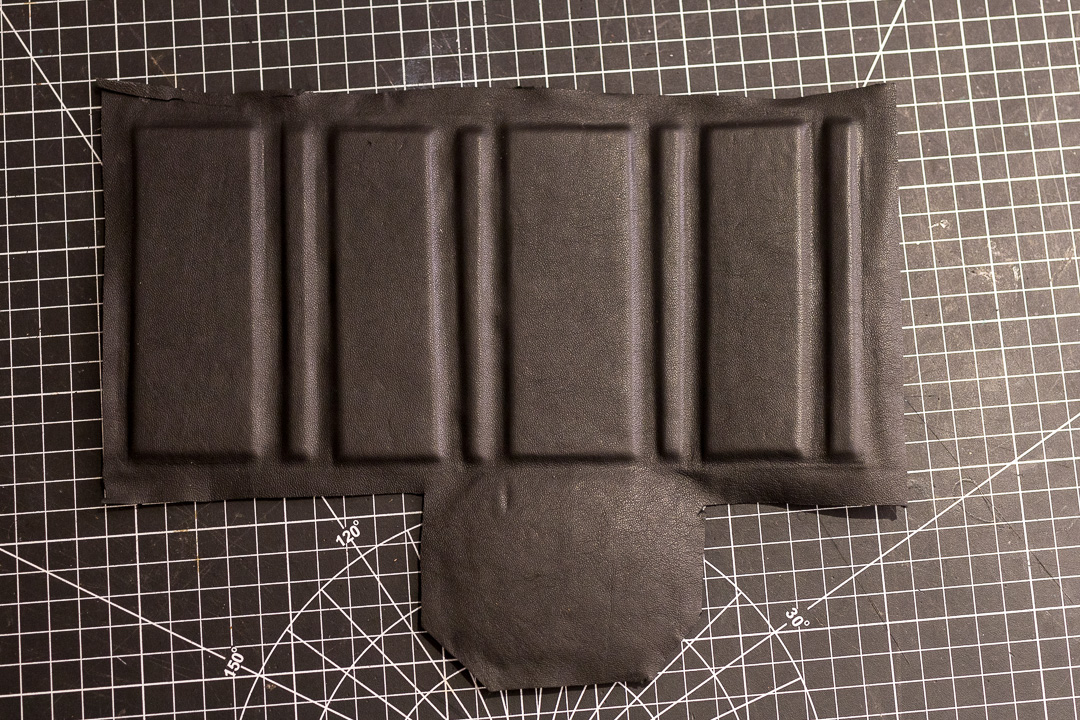
After the layers were assembled, I trimmed the panel to final size and checked the fit in the case. The mock fit confirmed the general shape.
One issue came from the stretch in the calf skin. When pull cutting for trimming, the material stretched ahead of the blade and then shrank back after the cut, leaving one side over-cut. I patched that edge with a turned-edge trim piece rather than rebuilding the panel.
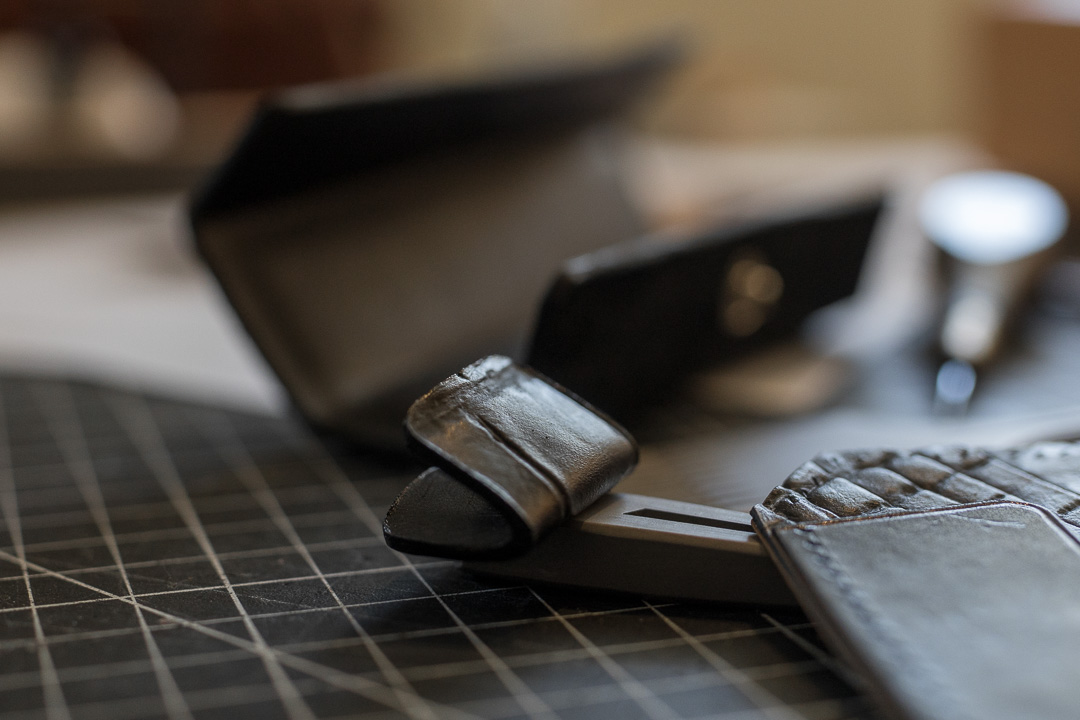
Lid insert
The lid insert holds the microfiber cloth and finishes the inside of the case lid. This part was built cut-to-size.
I used a slot knife to push-cut and trim the excess material. While there was no major stretch issue on this piece, push cutting gives better control through the thickness of the material.
Due to the several corners, this was a great opportunity to re-learn the general solution for corner stitching. The corner stitch needs to overshoot the horizontal guideline so the first vertical stitch can angle across the vertical guideline.
Due to the several corners, and the overlap around the cloth slot, it would have been better to draw a template to pre-plan the stitch holes.
Even after a lot of past hand-stitching, I had to re-learn some of the finer mechanics: hand priority, needle crossing, casting direction, pull direction, and tension.
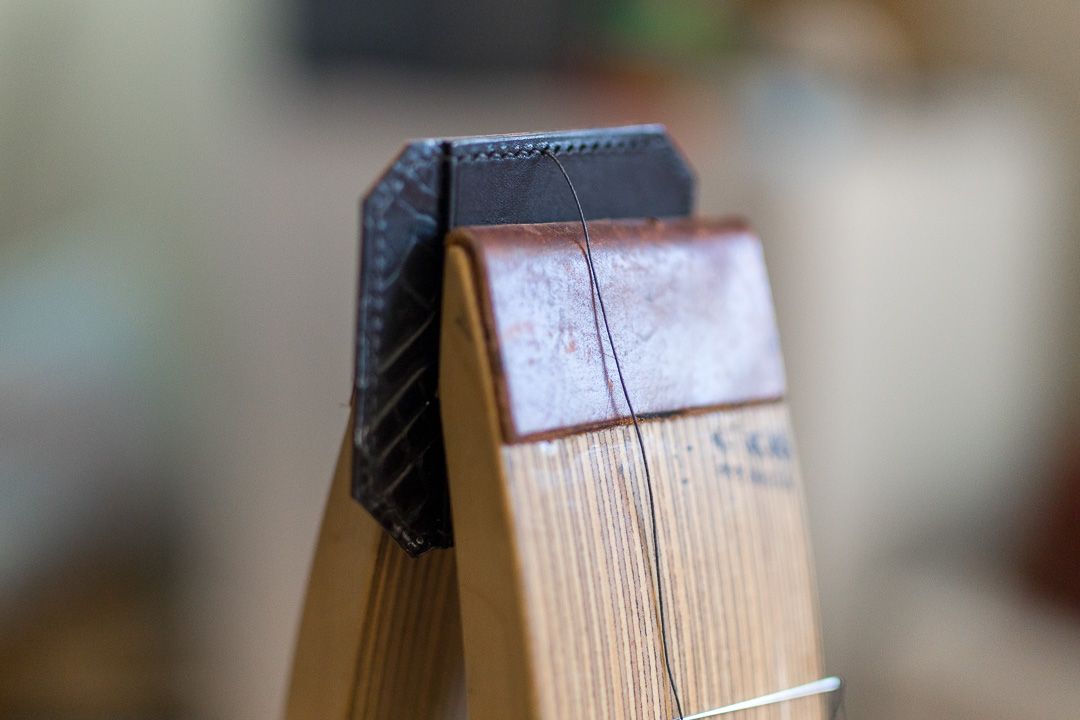
There are a few inaccuracies, but not bad.
Cable divider
The cable divider uses the same basic construction as the main panel: Salpa backing, foam padding, and a leather contact surface. It separates the glasses from the cable so the cable is not loose against the lenses or frame.
This piece was also built cut-to-size. The version shown here differs from the pattern above, mostly because the final fit had to be adjusted after the main insert was assembled.
There are a few changes I would make next time. The padding should be thinner, if used at all. The middle section needs more flexibility so it can bend without pushing into the glasses compartment. During glue-up, the fold should also be biased away from the glasses; otherwise, the divider takes up too much of the usable space.
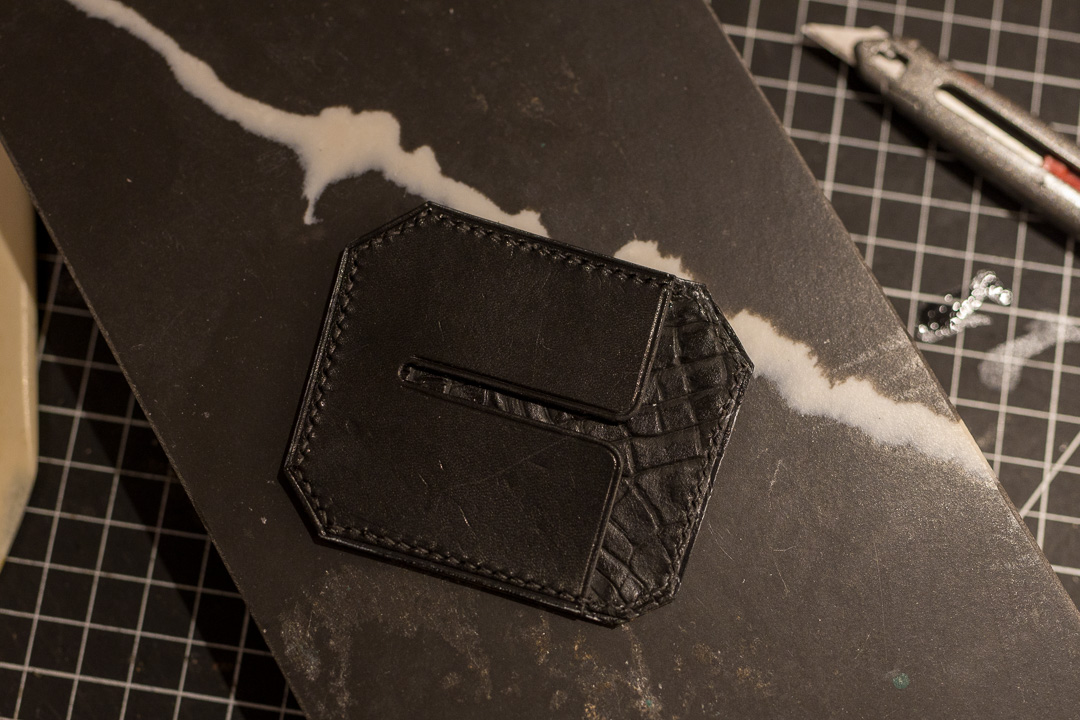
Misc
There were a few small detail pieces after the main insert was assembled. The corner gusset helps close the insert shape and keep the edge from looking unfinished. This piece should be thinner next time; at this scale, small thickness changes are noticeable.
I finished the exposed edges with Uniters edge paint. This is mostly a finishing step, but it also helps the small layered parts read as intentional rather than improvised.